All About Dehydrating.
Well, not ALL about dehydrating. Just the basics, really!
Dehydrating food: what does this mean, and why would I do it? How would I rehydrate it? And what if it’s gross? I’ve tried dehydrated [fill in the blank] before, and I didn’t like it. Also, I don’t have a dehydrator. They’re crazy expensive, and take up too much space, which I don’t have.
Aka FAQs and frequent barriers to food dehydrating.
[Swooshy dramatic sliding entrance commences]
I’m here to allay SOME of these questions and concerns!
I started learning to dehydrate food WAYYYYY back in the very early 2000s. Like, 2000, actually. Maybe 2001. My first-ever backpacking trip was in 1999. For food, I carried a couple cans of Campbells soup, a can opener, and a bowl in my VERY-heavy, WAY overloaded, CHEAP Army-Navy store backpack up the Guadalupe Peak Trail, which is rated strenuous. Also, this was the first time I’d ever hiked in my life. Or camped. Like, at all. I learned a lot. Like carrying canned soup is stupid-heavy, especially when you’re hiking basically straight uphill for 8 hours! But, I didn’t want to invest in good gear if the trip turned out to be a bust. Incidentally, the trip, despite it’s many issues (getting to the park 10 minutes after the office closed—because I didn’t take the time zone change into account, being in the same state and all, starting off on the wrong trail, my shoelaces getting tangled together, tripping me, and causing me to land face-first in the parking lot—while my once-itty-bitty-self had 40 lbs on my back…) was a life-changing trip that led to me learning numerous skills, such as dehydrating food, and even led me to my husband, several years later. It was backpacking that drew me to him. He even proposed to me during a trip, and we went backpacking for our honeymoon. ❤
Number ONE—what is dehydrating? Exactly what it sounds like—removing the hydration (water/moisture) from food. Low and slow heat dries out the food, therefore making it (more) shelf stable. Which, of course, is ideal to have on hand if the power goes out and you can’t use your electric appliances. So, question 1 and 2 are answered in 1 easy answer!
Number TWO—rehydrating is as easy as adding water to the dehydrated food. Since you removed the moisture using heat, you’ll need to add heat to rehydrate. For some items, you’ll need to rehydrate with boiling water. With others, hot water is sufficient. We’ll get into that in a bit.
And number THREE—my favorite question—what if it’s gross? Well, would you rather be fed, even if it’s not your favorite meal ever, or would you rather be dead, because the food wasn’t 5-star good? Real hunger has a way of making food that is otherwise not gourmet-quality into something resembling gourmet-quality! And, you won’t starve to death anyway. It takes weeks for that to happen. But, you’ll probably be hangry if you don’t just eat the possibly sub-par food, and NOBODY wants to deal with that!! Besides, dehydrated food doesn’t have to taste bad or subpar. If it does, it’s usually due to impatience during rehydrating. Or not hot enough water. My dehydrated spaghetti sauce is the bomb. Just sayin’. Dehydrated pumpkin puree tastes the same as canned pumpkin puree. And, who doesn’t love fruit roll-ups??!
MANY, many years ago, on a short 40-mile jaunt on the Appalachian Trail, a friend and I parked one vehicle in Damascus, VA (our ending point), and drove to Mt Rogers/Grayson Highlands Area to start our trip. When we parked my vehicle in Damascus, I noticed a little Italian place that smelled delicious! I always need to have a goal in mind—something to work towards. I had some pretty amazing food packed for my trip—including spaghetti and meat sauce! But to enjoy a post-backpacking meal that I didn’t have to rehydrate or cook myself? Yes, please!! Food is a big motivator for me, what can I say?! Although the scenery on this trip (well, every trip I’ve ever taken, actually), was beautiful and amazing, it was the memory of the smell of Italian food that kept me going during 15+ mile days! On our last day, I packed up, and spent the whole rest of the hike dreaming about spaghetti. I ate, of course, during my trip. But carrying everything you own in a backpack that can (ok, should) only be loaded proportionally to your weight, for 40 miles, when you weigh 100-lbs soaking-wet, and do NOT have goals of being an ultralight hiker, sure works up a girl’s appetite!!
When we arrived back in Damascus at the end of our hike, we were met by the smell of garlic bread and Italian seasonings. And I was STARVING (not literally, but you get the picture)!! I took a quick shower in the pay-shower at the hiker hostel there—which, if you’ve never showered in a hiker’s hostel’s shower, you are…..missing out on nothing. That was the best-feeling shower I’ve ever taken. It was also the most disgusting shower I’ve ever showered in, and I remember working VERY hard to not touch ANY surface, including the shower curtain. SO GROSS, but felt so good after several days of backpacking!!!
The food at the Italian place was kinda the same way! The spaghetti was watery, the sauce was probably from a jar, and the bread was the kind you get in the frozen foods section at the grocery store. And it was the Best. Spaghetti. Ever. Other than my mom’s. Which is genuinely, truly, the best stuff on planet Earth. Complete with these big, giant, fist-sized meatballs.
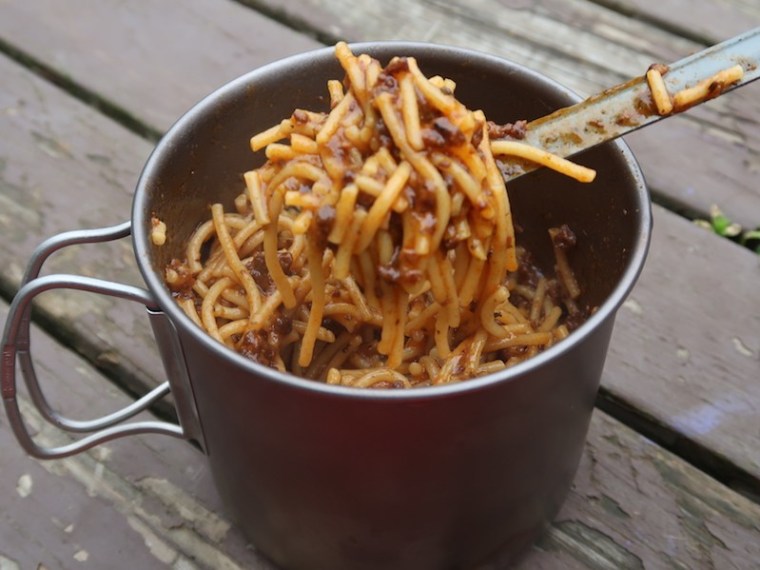
If the power has been out at your house for a couple days, and you’ve burned through your shelf-stable stash of poptarts, canned chicken, and whatever else you have that you don’t want to heat up, then cooking some noodles and rehydrating some ground beef and pasta sauce will be the Best. Spaghetti. Ever. Even if it’s watery, or the beef is chewy (which is a result of not rehydrating long enough, by the way—try again)!!
Special Equipment needed: at the most, an oven, and something to bake in (baking sheet, pyrex, non-stick pan, etc). That’s IT. Chances are, you probably already have those!!
At this point, really, all you need is some recipes that you can begin to make NOW. You can find THOUSANDS of them online, and I’ve included a few here. But really, what you need, is a book about dehydrating. Because these books will include instructions on REhydrating as well—and that is what you need when the power goes out!!
So let’s get into it!!
Herbs—these are the EASIEST to dry. All you do is make sure they are DRY, tie them up by the stem with some string or yarn, and then hang them up. I usually hang mine up in the kitchen, from one of the upper cabinet handles. It’s totally in my way when I do this, but for now, this is what I have to work with. You can also lay them flat and spaced out (so, not touching each other) on a cooling rack, and place in a dry location (like, probably NOT your laundry room) until dry. Herbs will dry within a few days to a few weeks, depending on heat and humidity levels in your house. And, once they are dried, just crunch them up into smaller flakes or whatever size you want, place in a baggie, and put in your spice cabinet. Or a drawer. Somewhere dark, and where you won’t forget about them. Then just use them the same way you would any of the dried herbs you buy at the grocery store, like oregano, basil, rosemary, etc.
Fruit—also insanely easy! Apples and bananas are 2 of my favorites because I can eat them on the go, without having to throw away peels or cores, or I can toss them in oatmeal, bread, cereal, and so many other things! There are lots of recipes for you to google, but here is one for apples:
- Get a bowl (size depends on the amount of apples), and put equal parts water and lemon juice in it.
- Wash, core, and peel apples. Start with 1 apple. If all goes well, buy 20 lbs of apples from Azure Standard, and make a whole day of apple dehydrating! Dehydrated apples will keep in airtight containers (like mason jars) for at least 6 months, a year or more in the freezer, and if you pressure can them, they can keep for several years in a cool, dark place. I’ve heard of people dipping into their stash after 10 years, and the apples were still fine. Do your homework, and see what you’re comfortable with!
- Slice apples into ¼” slices, and then into ¼” chunks. Or leave them in slices, if you prefer. I like the chunks—they work better in oatmeal and cookies.
- As you cut, place the pieces into the water/juice solution. You need enough to fully submerge the pieces.
- When you’re finished cutting up your apple, leave the pieces in the solution for about 10 minutes. While you’re waiting, you can go ahead and prep your space:
- Preheat your oven to it’s lowest setting. 150 is ideal, but mine only goes to 170.
- Place a metal cooling rack on a baking sheet. Or, if you don’t have a metal cooling rack, just line your baking sheet with parchment paper.
- When the 10 minutes is up, drain the apple pieces in a colander, and pat dry(ish)
- Spread apple pieces out onto the cooling rack or baking sheet, making sure the pieces don’t touch. They can be suuuper close together, but if they’re touching, that prevents air circulation, which leads to moisture retention, which leads to nasty, smelly, moldy apple pieces later on. And nobody wants that!!
- If you want to season your apples with cinnamon sugar or something, now is the time to do this.
- Place baking sheet in the oven. You’ll want to keep the oven cracked during dehydration so the air can escape. You’re dehydrating, not baking, so you don’t want to trap any moisture in there.
- This will take 2-3 or so hours, depending on oven temp and how much moisture was left in the apples when you put them in. So, about every hour or so, either flip them or give them a good shake to air them out a bit more. Sometimes I forget this step, so if you do too, that’s ok!
- You’ll know the apples are done when they feel dry but slightly tacky when you pick up a piece. Make sure to check several pieces, particularly the largest one you can find. If you squeeze it, and any moisture comes out, or your fingers feel wet, they’re not done. Put them back in and check on them about every 30 minutes or so.
- Store in an airtight container, such as a mason jar, and put in your pantry or freezer.
- If you choose to rehydrate your apples (I don’t, but you do you!!), you can do this 1 of 2 ways:
- fill a bowl with lukewarm water, and let it sit on the counter for about 30 minutes or so, or until it reaches room temperature. Place dried apples in the water (make sure the apples are fully submerged—too much water is better than not enough). Let sit for another 30 minutes.
- Place a saucepan on the stove, and fill with water (1-1 ½ cups of water per cup of dried apples). Bring to a boil. Once the water is boiling, place apples in the water. Wait 5 minutes and check the consistency. Check with a fork or toothpick every 2 minutes after that until the apples are the consistency you want.
Last recipe for the week—ground beef. You can also use ground chicken or ground turkey. This is easy as well, but there is a trick. You HAVE to get the leanest ground beef you can find, and you need to use a stainless steel or good nonstick pan. Not cast iron.
To dehydrate ground beef, cook it on the stove the way you normally would—you can even season it up if you want. Just DO NOT add extra fat. No butter, no oils, no nada.
When the beef is finished, drain if needed, and pat dry. Then, just like with the apple pieces above, either spread out on a cooling rack placed over a baking sheet, or place directly on a parchment paper-lined baking sheet.
Pop in your oven set to it’s lowest setting—but no lower than 145. Same as with apples, you’ll want to keep the oven cracked.
Now, here’s where things get….whatever you want to call it. It’s gonna take you anywhere from 3-10+ hours to dehydrate your beef!! It all depends on how lean it is, how low your oven will go, how dry it was when you placed it in the oven—stuff like that. So if you normally only get 5-7 hours of sleep a night anyway, you might want to just try this out in your oven overnight and see how it goes. Otherwise, start it in the morning, and just check on it every couple of hours or so throughout the day, until it’s done. In my 170-degree oven, it takes 3-5 hours for me. You’ll know the beef is done when it crumbles easily with no obvious moisture.
Store in an airtight container, like a mason jar. This will keep in your pantry for at least a year, if not longer. Or, for way longer in your freezer.
To rehydrate, bring water or any kind of broth to a boil (chicken is what we usually have on hand, and beef, obviously, is awesome, but veggie broth puts rehydrated beef on a whole new delicious level!). About a cup or so of liquid to 1 cup of dehydrated beef. Cover, reduce heat to low, and let sit for 15+ minutes. If your beef isn’t the texture you want, add more liquid, bring back to a boil, then reduce heat to low and check every 5 or so minutes.
Final notes:
There is a process called conditioning that is pretty important when storing food you have dehydrated. After you put the food in an airtight container, give it a shake every day for the first 5-7 days. Check for signs of moisture build-up, mold, sticking—anything like that. If you see any signs that the food is not fully dehydrated, just pop back in the oven for another few hours, and try again.
Dehydrating is a slow process that requires planning. But it’s a simple process that brings quite a bit of peace of mind. And, who knows, by learning to dehydrate your own food, you might be inspired to assemble your own backpacking meals, and take a trip!! Just don’t trip over your laces. Especially not in front of your friends. It’s a little embarrassing…

Leave a comment